Índice
- Understanding the Basics of Soundproofing with Drywall
- The Importance of Soundproofing
- How Drywall Works as a Sound Barrier
- Steps for Drywall Soundproofing Installation
- Finding the Right Professionals
- Essential Tools and Materials for Effective Drywall Soundproofing Installation
- Key Materials for Soundproofing
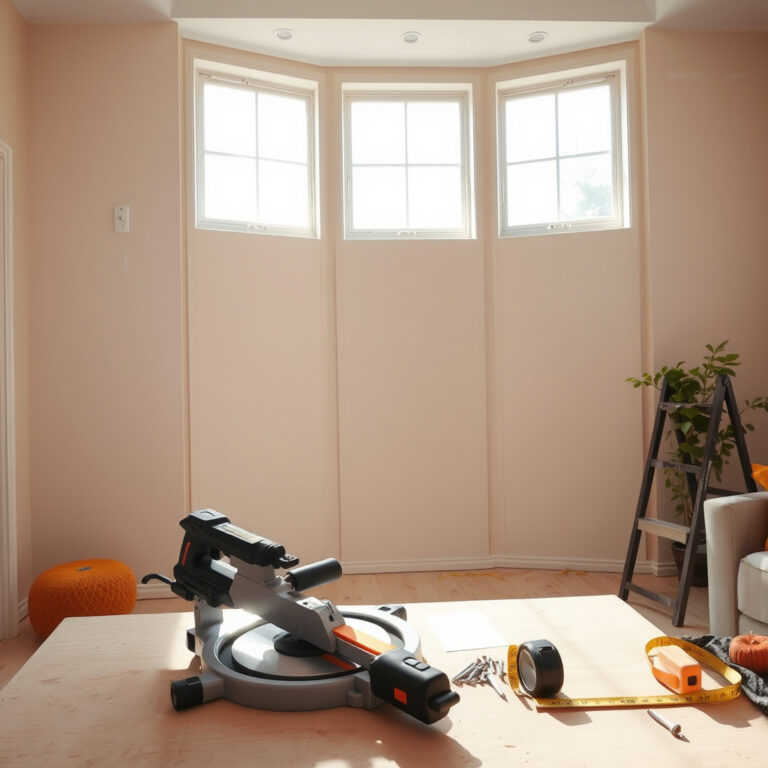
- Essential Tools for Installation
- Safety Gear
- Step-by-Step Guide to Drywall Soundproofing Installation
- Step 1: Prepare Your Space
- Step 2: Choose the Right Materials
- Step 3: Install Resilient Channels
- Step 4: Add Insulation
- Step 5: Install the Drywall
- Step 6: Seal the Gaps
- Step 7: Finish the Surface
- Step 8: Final Touches
- Common Mistakes to Avoid in Drywall Soundproofing Installation
- Ignoring Proper Materials
- Neglecting Soundproofing Techniques
- Overlooking the Importance of Sealing
- Improper Installation of Resilient Channels
- Forgetting About the Floor and Ceiling
- Rushing the Process
- Failing to Seek Professional Help
- Advanced Techniques for Enhancing Soundproofing with Drywall
- Utilizing Resilient Channels
- Adding Mass with Specialized Drywall
- Sealing Gaps and Cracks
- Implementing Sound-Absorbing Insulation
- Creating a Double Layer System
- Consulting with Professionals
- Maintaining and Repairing Drywall Soundproofing Installations
- Routine Inspections
- Repairing Damage
- Enhancing Soundproofing
- Regular Maintenance Tips
- The Impact of Soundproofing on Interior Finish Carpentry Projects
- The Synergy Between Soundproofing and Finish Carpentry
- Choosing the Right Materials
- Integrating Soundproofing Techniques
- Maintaining Aesthetic Appeal
Drywall soundproofing installation refers to the process of using specialized drywall techniques to minimize sound transmission between rooms.
If you’re searching for effective ways to enhance your home’s tranquility, drywall soundproofing installation should be at the top of your list.
In this post, we will dive into the essentials of soundproofing, revealing techniques that can significantly reduce noise pollution in your living space.
By the end, you’ll understand the benefits, materials needed, and the installation process to create a peaceful environment in your home.

Understanding the Basics of Soundproofing with Drywall
When it comes to creating a peaceful environment in your home or office, understanding the basics of soundproofing with drywall can make a significant difference. Many people seek ways to reduce noise from external sources or between rooms, and drywall soundproofing installation is an effective solution. Drywall, also known as sheetrock, is a popular material used in construction due to its versatility and ease of installation.
The Importance of Soundproofing
In today’s world, noise pollution can be a common concern. Whether it’s the sounds of traffic, noisy neighbors, or the hustle and bustle of daily life, unwanted noise can lead to stress and decreased productivity. Soundproofing your space not only enhances comfort but can also improve your overall well-being. Using drywall as a sound barrier is an accessible and cost-effective method to minimize sound transmission.
How Drywall Works as a Sound Barrier
Drywall soundproofing installation relies on the principles of mass, damping, and decoupling. The mass of the drywall helps to block sound waves from passing through, while damping materials can absorb vibrations. Additionally, decoupling techniques, such as using resilient channels, can further enhance sound isolation by preventing direct contact between the drywall and framing.
- Mass: Adding multiple layers of drywall increases the mass, which effectively blocks sound.
- Damping: Incorporating specialized damping compounds between drywall layers can significantly reduce sound transmission.
- Decoupling: Techniques like installing resilient channels create a separation that alleviates sound travel.
Steps for Drywall Soundproofing Installation
If you’re considering a drywall soundproofing installation project, it’s essential to follow a few basic steps. Here’s a simple guide to get you started:
- Assess Your Space: Determine which walls or ceilings require soundproofing. This helps in planning your materials and budget.
- Choose the Right Materials: Look for high-density drywall options or specialized soundproofing drywall. Consider additional materials like acoustic caulk and resilient channels.
- Prepare the Area: Clear the space and ensure the wall surfaces are clean and dry before installation.
- Install Drywall: Follow the guidelines for sheetrock installation. Use appropriate fasteners and techniques to secure the panels effectively.
- Seal Gaps: Use acoustic caulk to seal any gaps or joints, as these can be weak points for sound transmission.
- Finishing Touches: Once installed, you can proceed with finishing carpentry services, such as adding trim or paint.
Finding the Right Professionals
For those who prefer to leave it to the experts, searching for drywall contractors near me can connect you with skilled professionals who specialize in drywall installation. They can provide valuable insights into the drywall installation cost and help ensure a quality finish. If you’re interested in combining soundproofing with other interior improvements, consider hiring finish carpentry contractors who can enhance your space with elegant trim and details.
By understanding the basics of drywall soundproofing installation, you can take proactive steps toward creating a quieter, more comfortable environment. Whether you choose to tackle the project yourself or hire professionals, knowing what to expect will help make the process smoother and more rewarding.
Essential Tools and Materials for Effective Drywall Soundproofing Installation
When embarking on a drywall soundproofing installation project, having the right tools and materials at your disposal is crucial for achieving optimal results. Soundproofing is not just about the drywall itself; it involves a thoughtful combination of materials and tools that work together to enhance sound isolation. Below, we delve into the necessary components that will make your installation process smoother and more effective.
Key Materials for Soundproofing
To start, selecting the right materials is vital. Here are some essential items you’ll need:
- Soundproof Drywall: Look for specially designed drywall that incorporates extra density and mass, such as soundproof gypsum board. Brands like QuietRock or other sound-dampening products can significantly reduce sound transmission.
- Acoustic Caulk: This flexible sealant is perfect for sealing gaps and cracks. It prevents sound leaks that can occur around edges and joints, ensuring a tight seal.
- Green Glue: A popular choice among drywall contractors, Green Glue is a noise-proofing compound applied between two layers of drywall. It effectively dissipates sound waves.
- Insulation: Fiberglass or mineral wool insulation can be placed between studs to further dampen sound. This adds mass and absorbs sound, making it crucial for walls and ceilings.
Essential Tools for Installation
Equipping yourself with the right tools can make all the difference in your drywall installation. Here’s a list of must-have tools:
- Measuring Tape: Accurate measurements are essential for cutting your drywall to fit correctly.
- Utility Knife: A sharp utility knife will help you score and cut drywall with precision.
- Drywall Lift: This tool is invaluable for lifting large sheets of drywall, especially for ceiling installations. It makes the job much easier and safer.
- Drill and Drywall Screws: A power drill is essential for securing drywall sheets to studs. Make sure to use the right screws designed for drywall installation.
- Tape Measure and Square: These tools ensure that your cuts are straight and accurate, which is vital for a clean finish.
- Joint Knife: For applying joint compound smoothly over seams, a joint knife is necessary. This tool helps create a seamless look.
- Sandpaper or Pole Sander: After taping and mudding, sanding the surface is crucial for a smooth finish before painting.
Safety Gear
Don’t overlook the importance of safety while working on your drywall soundproofing installation. Here are some items to consider:
- Dust Mask: Protect yourself from dust and particles that can be released during cutting and sanding.
- Safety Glasses: These will shield your eyes from debris, especially when cutting drywall.
- Hearing Protection: When using power tools, it’s wise to wear ear protection to prevent hearing loss.
By gathering the right materials and tools, you can ensure a successful drywall soundproofing installation. Whether you’re tackling the project yourself or hiring professionals, understanding what’s needed will help you achieve the quiet environment you desire. If you’re searching for help, consider looking for drywall contractors near me who specialize in drywall installation and sheetrock installation to get expert assistance.
Step-by-Step Guide to Drywall Soundproofing Installation
When it comes to achieving peace and quiet in your home, drywall soundproofing installation is a game changer. By incorporating soundproofing techniques into your drywall project, you can reduce noise transmission, making your space more comfortable and enjoyable. Below is a comprehensive guide that walks you through the installation process, ensuring you have all the steps needed to get the job done right.
Step 1: Prepare Your Space
Start by clearing the area where you’ll be working. Remove any furniture, wall hangings, and fixtures that might obstruct your installation. It’s also a good idea to patch any holes or imperfections in the existing drywall. This will create a smooth surface for your new drywall to adhere to and improve overall soundproofing effectiveness.
Step 2: Choose the Right Materials
Selecting the appropriate materials is crucial for effective soundproofing. Consider using soundproof drywall, which is specifically designed to block sound waves. Additionally, you might want to incorporate acoustic caulk, resilient channels, and soundproofing insulation. Make sure to gather all necessary tools, such as a utility knife, measuring tape, drywall screws, and a drill.
- Soundproof drywall
- Acoustic caulk
- Resilient channels
- Soundproofing insulation
- Utility knife
- Measuring tape
- Drywall screws
- Drill
Step 3: Install Resilient Channels
Resilient channels are key in dampening sound. Begin by installing these metal strips horizontally on the studs of your wall. Make sure they are spaced correctly, typically 24 inches apart, allowing for better sound isolation. Ensure that the channels are not directly attached to the drywall; this separation helps reduce vibrations.
Step 4: Add Insulation
Before putting up your drywall, insert soundproofing insulation between the studs. This step is essential for absorbing sound waves and reducing noise transmission. Opt for high-density fiberglass or mineral wool insulation, as these materials are excellent at blocking sound.
Step 5: Install the Drywall
Now it’s time for the main event: installing the drywall. If you’re using soundproof drywall, this is where its benefits come into play. Cut your sheets to the appropriate size and secure them to the resilient channels or studs using drywall screws. Be sure to stagger the seams of your drywall sheets for added strength and soundproofing effectiveness.
Step 6: Seal the Gaps
Once your drywall is up, it’s crucial to seal any gaps to prevent sound leaks. Use acoustic caulk to fill in the spaces around the edges of your drywall. Pay special attention to corners, outlets, and any other penetrations.
Step 7: Finish the Surface
With your drywall securely in place and gaps sealed, you can now focus on the finishing touches. Tape and mud the seams, then sand the surface smooth. This step prepares your walls for painting or any further finish carpentry you may wish to undertake. If you’re considering custom moldings or trim, you might look for finish carpentry near me to enhance the aesthetic appeal of your newly soundproofed space.
Step 8: Final Touches
After the mudding and sanding process is complete, you can apply a coat of primer followed by your chosen paint color. This final step not only beautifies your walls but also adds an extra layer of protection.
By following these steps for your drywall soundproofing installation, you can create a serene environment that meets your sound isolation needs. Whether you’re a DIY enthusiast or looking for professional help, understanding this process will ensure you achieve the best results in your project. If you’re exploring professional options, consider reaching out to drywall contractors near me for assistance with your installation or other drywall services.
Common Mistakes to Avoid in Drywall Soundproofing Installation
When tackling a drywall soundproofing installation, it’s crucial to approach the project with care. Many homeowners and even seasoned DIY enthusiasts can make mistakes that compromise the effectiveness of their soundproofing efforts. By understanding these common pitfalls, you can ensure a smoother installation process and achieve better results.
Ignoring Proper Materials
One of the first mistakes people make is choosing the wrong materials. Not all drywall is created equal. For soundproofing, it’s essential to opt for specialized soundproof drywall, which is more effective than standard options. Additionally, using materials like acoustic caulk, resilient channels, and insulation can significantly enhance sound isolation. Failing to incorporate these can lead to unsatisfactory results.
Elevate Your Space with Expert Finish Carpentry
Transform your home with precision-crafted custom cabinetry, trim work, and door installations by WPro Multi Services. Our expert craftsmanship enhances style, durability, and value. Request a free consultation today and bring your vision to life!
Get Your Free Quote NowNeglecting Soundproofing Techniques
Simply installing drywall won’t do the trick. It’s vital to understand soundproofing techniques. For instance, leaving gaps between drywall sheets can allow sound to leak through. Always ensure tight seams and consider applying a double layer of drywall for improved sound attenuation. Utilizing techniques like staggered stud framing or decoupling can further reduce sound transmission, so don’t overlook these methods.
Overlooking the Importance of Sealing
Another common mistake is neglecting to seal joints properly. Gaps can be the Achilles’ heel of your drywall installation. Use acoustic sealant to fill any gaps or cracks, especially around electrical outlets and light fixtures. This simple step can greatly enhance the overall effectiveness of your soundproofing project.
Improper Installation of Resilient Channels
When using resilient channels, precise installation is key. Many DIYers miss the mark by not adhering to manufacturer guidelines. Ensure that the channels are installed perpendicular to the studs and that the drywall is not directly attached to the studs. This creates a decoupling effect, which is vital for soundproofing.
Forgetting About the Floor and Ceiling
Soundproofing doesn’t stop at the walls. Many individuals focus solely on the drywall and forget about the ceiling and floor. To achieve comprehensive soundproofing, consider using soundproofing mats or additional drywall layers on ceilings and floors. This holistic approach can significantly enhance your sound isolation.
Rushing the Process
Patience is a virtue, especially in a sheetrock installation. Rushing through the installation can lead to sloppy work and oversight of critical steps. Take your time to ensure that every layer is properly installed and that all materials are of high quality. A meticulous approach pays off in the long run.
Failing to Seek Professional Help
If you’re feeling overwhelmed, don’t hesitate to seek assistance from drywall contractors near me. Professionals can offer expertise and ensure that the installation is done correctly the first time. This can save you time, effort, and potential costly mistakes.
By being aware of these common mistakes and taking the time to plan your drywall soundproofing installation, you can create a quieter and more peaceful environment in your home. Whether you’re looking for finished carpentry solutions or seeking drywall installation near me, focusing on these details will make all the difference in your soundproofing project.
Advanced Techniques for Enhancing Soundproofing with Drywall
When it comes to achieving optimal soundproofing with drywall, there are advanced techniques that can significantly enhance your results. Combining traditional methods with innovative practices can create a quieter environment, perfect for home theaters, music studios, or simply a peaceful living space.
Utilizing Resilient Channels
One of the most effective ways to improve soundproofing is by incorporating resilient channels during your drywall soundproofing installation. These metal strips are installed perpendicular to the studs before the drywall is applied. They create a separation between the drywall and the wall studs, which helps to minimize sound transmission. By absorbing vibrations, resilient channels can effectively reduce noise from adjacent rooms.
Adding Mass with Specialized Drywall
Another advanced technique involves using specialized drywall products designed for soundproofing. Products like mass-loaded vinyl (MLV) or soundproof drywall can add significant mass to your walls, which is essential for blocking sound. During your sheetrock installation, consider layering these materials to further enhance the sound barrier. This approach is particularly beneficial in areas where noise is a persistent issue.
Sealing Gaps and Cracks
Proper sealing is critical in preventing sound leakage. Use acoustic caulk to seal any gaps around electrical outlets, windows, and doors. This step is often overlooked but can dramatically improve the effectiveness of your soundproofing. During the drywall installation, ensure that edges are tightly sealed and that there are no spaces that might allow sound to escape.
Implementing Sound-Absorbing Insulation
Another powerful strategy is to incorporate sound-absorbing insulation within your walls. Products like fiberglass or foam insulation can be inserted between studs before the drywall is installed. This additional layer not only helps with thermal insulation but also absorbs sound waves, reducing their transmission through walls.
Creating a Double Layer System
For maximum effectiveness, consider a double-layer drywall system. By installing two layers of drywall, particularly when using special soundproofing drywall, you can significantly increase the wall’s mass. Use a staggered joint technique to avoid creating a direct path for sound to travel. This method can be particularly beneficial in shared walls between apartments or rooms.
Consulting with Professionals
If you’re unsure about the best techniques for your project, consulting with drywall contractors near me can provide valuable insights. They can guide you in selecting the right materials and methods based on your specific needs, ensuring a professional finish that enhances soundproofing.
By integrating these advanced techniques into your drywall soundproofing installation, you can create a serene environment that keeps unwanted noise at bay. Whether you’re looking for finished carpentry services or simply aiming to improve your home’s acoustics, these strategies will help you achieve a more peaceful living space.
Maintaining and Repairing Drywall Soundproofing Installations
When it comes to drywall soundproofing installation, ensuring that your setup remains effective over time is crucial. Regular maintenance and timely repairs can significantly enhance the longevity and performance of your soundproofing efforts. Here, we will explore some practical steps you can take to keep your drywall soundproofing in top shape.
Routine Inspections
Start by conducting routine inspections of your drywall soundproofing installations. Look for any visible signs of damage such as cracks, dents, or moisture stains. These issues can compromise the soundproofing effectiveness. Pay special attention to the joints and seams, as they are often the first areas to show wear.
- Check for Cracks: Small cracks can allow sound to seep through. Don’t ignore them; they can grow over time.
- Look for Moisture: Moisture can weaken drywall and lead to mold. If you see water stains, investigate further.
- Inspect Seams: Ensure that all seams are sealed properly to maintain sound barriers.
Repairing Damage
If you find any damage during your inspections, addressing it promptly is essential. Minor repairs can often be done without needing to hire professional help, but understanding when to call in drywall contractors near me is also important.
- Patch Cracks: Use a joint compound to fill in cracks. Once dry, sand it down smoothly to match the surrounding area.
- Replace Damaged Panels: For larger holes or damage, consider replacing the affected section of drywall. This ensures that the soundproofing remains effective.
- Reapply Acoustic Sealant: After repairs, reapply acoustic sealant around joints and edges to restore the sound barrier.
Enhancing Soundproofing
While maintaining your existing drywall soundproofing installation, you might also want to enhance it further. This could involve adding additional layers of drywall or utilizing soundproofing materials. If you’re considering this route, hiring finish carpentry services can help ensure a professional finish.
- Add Mass Loaded Vinyl: This material can be applied to existing drywall for added soundproofing without significant remodeling.
- Install Resilient Channels: These can be added to the framing to decouple the drywall from the wall, reducing sound transmission.
- Consider Soundproofing Foam: Installing soundproofing foam can also improve sound absorption in the room.
Regular Maintenance Tips
To keep your drywall soundproofing in optimal condition, consider the following maintenance tips. This proactive approach can save you time and money in the long run.
- Dust Regularly: Build-up of dust can affect the integrity of the soundproofing materials. Regular cleaning keeps everything functioning well.
- Monitor Humidity Levels: High humidity can damage drywall and its soundproofing capabilities. Use dehumidifiers if necessary.
- Address Noise Issues Early: If you notice new noise issues, investigate promptly. Early detection can prevent larger problems down the line.
By following these guidelines for maintaining and repairing your drywall soundproofing installation, you can ensure that your space remains comfortable and quiet. Should you need assistance with repairs or enhancements, don’t hesitate to reach out to professionals specializing in drywall installation services or finished carpentry near me. Proper care will extend the life and effectiveness of your soundproofing, creating a peaceful environment for years to come.
The Impact of Soundproofing on Interior Finish Carpentry Projects
When it comes to enhancing the quality of living in any space, soundproofing plays a vital role, particularly in interior finish carpentry projects. The integration of drywall soundproofing installation can significantly transform how a space feels and functions. Understanding the nuances of this process not only benefits your overall design but also elevates the craftsmanship involved in finish carpentry.
The Synergy Between Soundproofing and Finish Carpentry
The relationship between soundproofing and finish carpentry is interdependent. When you undertake a drywall installation, particularly in spaces like home theaters, bedrooms, or multi-family units, the choice of materials and techniques becomes crucial. Finish carpentry services often involve adding trim, molding, and other elements that can either enhance or compromise soundproofing. For instance, using thicker trims or sealing gaps effectively can help minimize sound leakage, ensuring a quieter, more serene environment.
Choosing the Right Materials
Selecting appropriate materials is essential for a successful drywall soundproofing installation. The right combination of drywall types, soundproofing membranes, and insulation can greatly affect the outcome. Many drywall contractors near me recommend using resilient channels and sound-dampening materials that fit seamlessly within the framework of your finish carpentry. This approach not only improves sound insulation but also complements the aesthetic appeal of the finished project.
- Soundproof Drywall: Specialized products like Green Glue or soundproof drywall panels can be integrated into your interior carpentry services.
- Insulation: Acoustic insulation can be added between wall studs to reduce sound transmission.
- Sealing Gaps: Proper sealing of gaps with caulk or foam helps maintain the integrity of the sound barrier.
Integrating Soundproofing Techniques
As you plan your finish carpentry, consider how soundproofing can be integrated into the design. For example, when installing finished carpentry, you can utilize techniques such as staggered stud framing or double-layer drywall to enhance sound isolation. These methods not only provide functional benefits but also allow for creative design possibilities, making your spaces not just quieter, but more inviting.
Maintaining Aesthetic Appeal
While soundproofing is essential, maintaining the aesthetic appeal of your carpentry is equally important. Skilled finish carpentry contractors can help blend soundproofing solutions with stylish designs. From selecting the right finishes to ensuring that trim work complements soundproofing efforts, these professionals can create a harmonious balance that meets both functional and visual standards.
Incorporating soundproofing into your interior finish carpentry projects enhances the overall living experience without sacrificing style. With the right approach, you can achieve a perfect blend of functionality and beauty, making your home a peaceful retreat. Whether you’re searching for drywall installation near me or looking for advice on how to install soundproofing materials, understanding the impact of these techniques will guide you in creating a serene and beautifully finished space.

At W Pro Multiservices Blog, we are passionate about finish carpentry, custom cabinetry, door installation, and trim work. With years of hands-on experience, we share expert insights to help homeowners, designers, and real estate investors make informed decisions. Our mission is to transform ordinary spaces into elegant, high-quality interiors with precision craftsmanship. Join us as we explore the art of exceptional home finishes!


